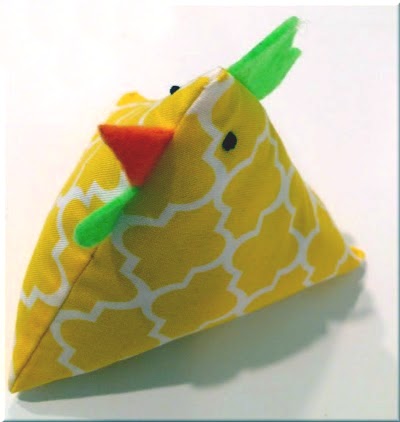
Let's Make a Chicken:
Gathering Materials
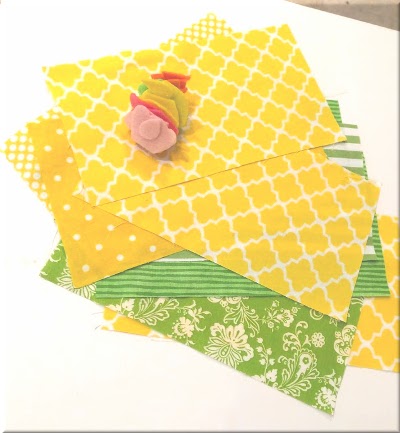
Find fabrics to match the chickens of your dreams! I especially like stripes, geometric designs, and polkadots.
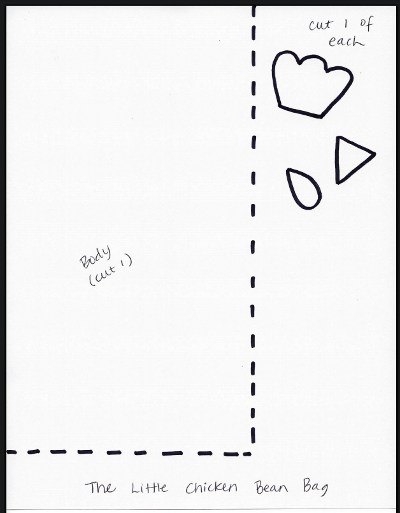
For each chicken, you will need a rectangle of about 5 1/4 inches (14 cm) by 10 inches (25 cm). Print the pattern from gluesticksblog.com. Note: remember to unselect "fit-to-page" before you print it.
Next, trace and cut out the small pieces from the pattern -- the comb, beak, and wattles. (I've recently learned that a chicken has 2 wattles, not just one, so my sample chickens need one more each. Oh well.)
You will also need to gather:
One last design decision:
To make eyes like my sample chickens, you will need embroidery floss and a needle to sew French knots. Alternative ways to create eyes include buttons or beads, which can be sewn on or glued on, or even a permanent marker would work to draw eyes on your chickens.
Placement
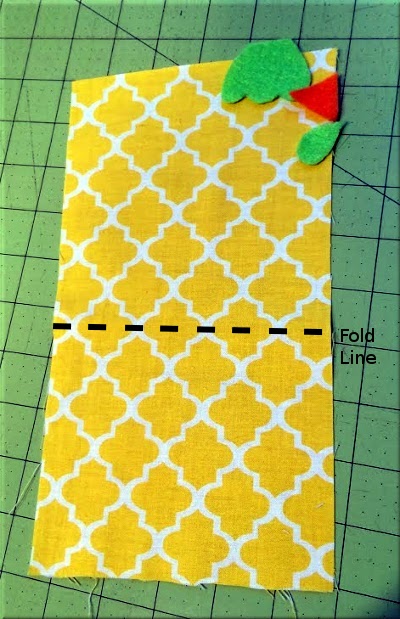
- Place the fabric right-side up (that is, the print is on top, facing you). Position the fabric rectangle so that its base is smaller than its height.
- Next, place the comb on right side of the top, upside down, with a little bit of the comb poking over the fabric's edge.
- The beak should be placed a little ways down from the top, on the right side of the fabric. Again, a little bit of it should hang over the edge of the fabric.
- The wattles should be placed underneath the beak, at a slight angle.
- Go ahead and pin the chicken parts to the fabric.
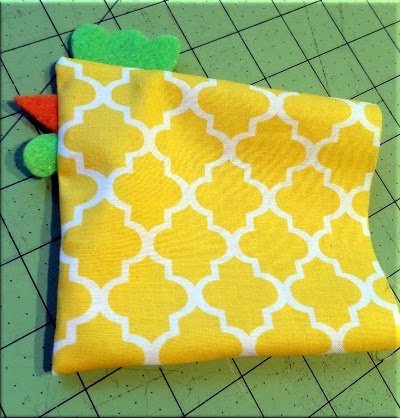
Chicken Sandwich
Take the bottom of the rectangle and fold it up to reach the top of the rectangle. Pin the two layers of the rectangle together to help keep them together.
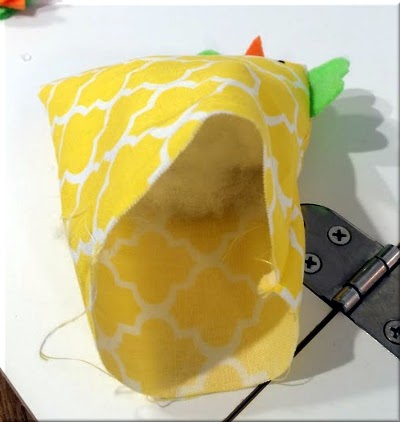
Sewing Time
Using an eighth-inch seam allowance, sew the right-hand side and top. (Leave the left open.) Then turn your project right-side out.
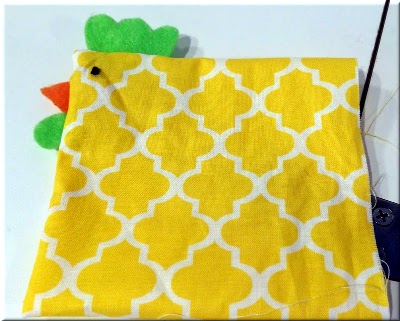
Eyes
This point of the project is a good time to add eyes. My favorite are French knots. But you may use any type of eye you'd like. Go ahead and glue, sew, or draw.
To Make a French Knot:
- Thread your needle with embroidery thread, knot the end, and stick your hand holding the needle inside the chicken.
- Push the needle out where you want an eye to be. Pull the thread all the way through,leaving the knot inside the chicken.
- Here's the trickiest part: hold your needle pointed back near the fabric, close to the eye hole, and wrap the thread around the needle about 3 times. Use the part of the thread that is closest to the fabric to do the wrapping. Hold on to the rest of the thread with the hand that doesn't have the needle and keep it pretty taut. Now push the needle through the fabric, close to (but not exactly at) your original eye hole.
- Finally, pull the thread the rest of the way through the fabric. Your non-needle hand can let go of the thread near the end of the pull.
- Make another eye on the other side of the chicken. When both eyes are done, tie a knot in your thread and cut off the excess thread.
Here is a French knot video by Professor Pincushion, for a helpful visual tutorial.
Chicken Stuffing
Time to make our chicken three-dimensional!
Start with a little of the fiberfill.
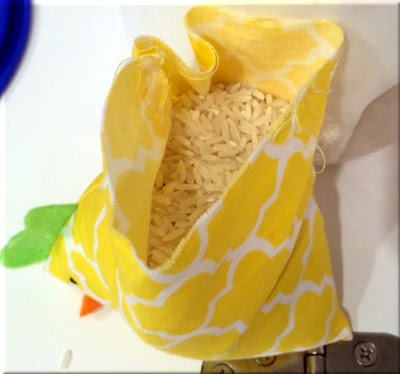
Then add some rice, beans or plastic pellets. Leave room for a bit more fiberfill and for folding in the raw edges of the fabric opening.
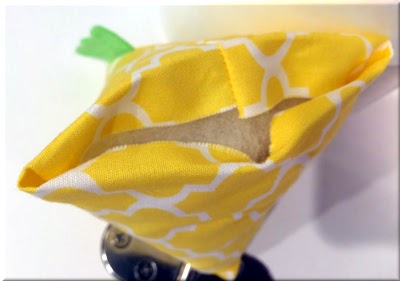
After you've added the last bit of fiberfill, fold in the raw edges and pin.
Closing Time
The very last step is sewing the opening closed. I like to use my sewing machine for this, but you could sew it by hand if you prefer. Make it secure, so that no rice or fiberfill will leak out. (This isn't a "poop duck", after all!)
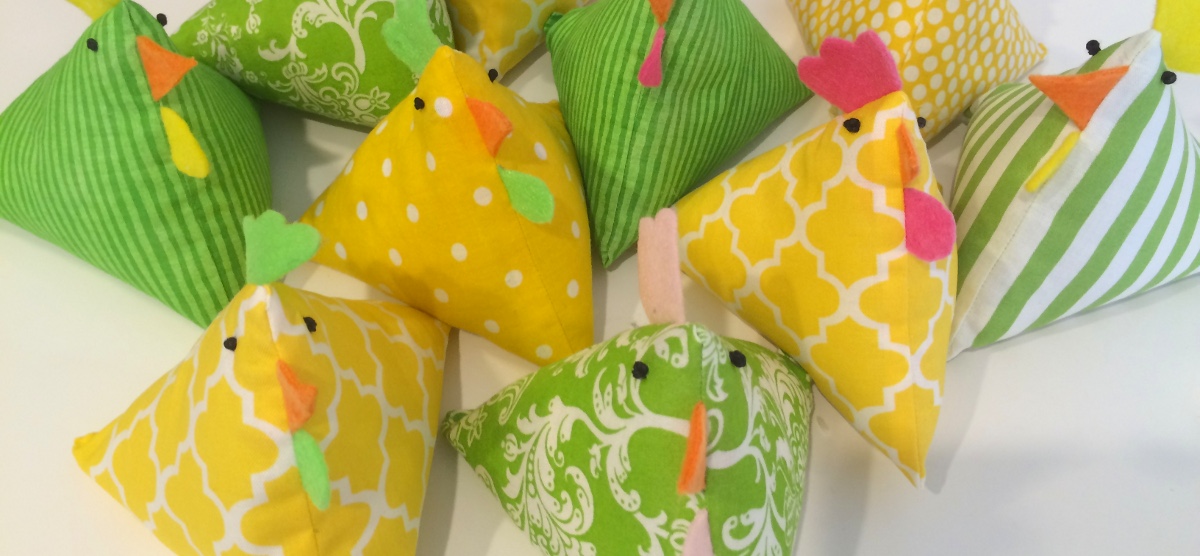
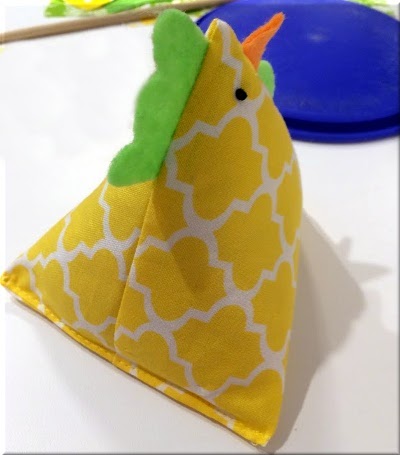
You did it!
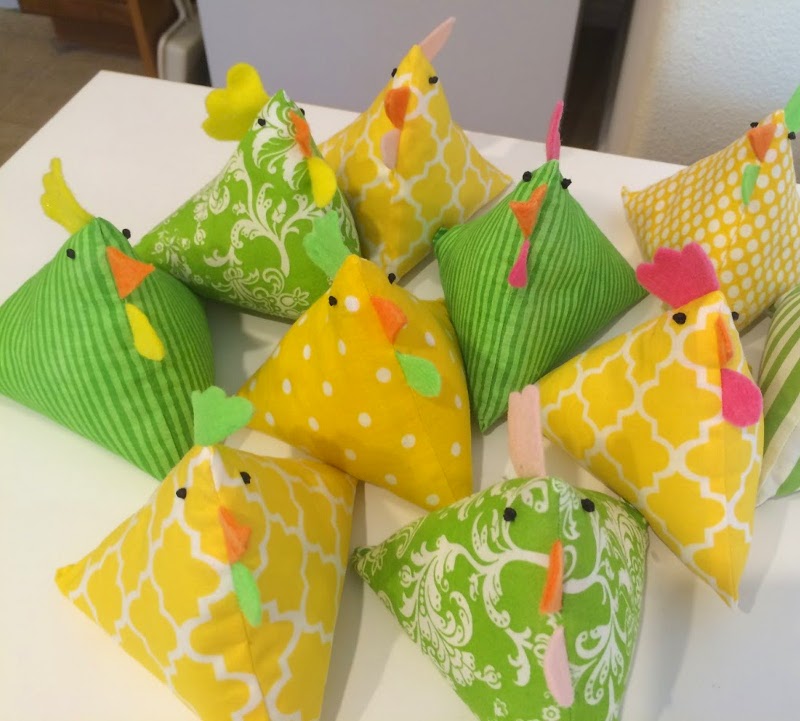
These little chickens are great to throw, to snuggle with, to give
away as gifts, to tell jokes to, and even to play speed 'chick'-tac-toe
with.
I hope that you have enjoyed this little project.
To Play Speed 'Chick'-Tac-Toe:
- Divide the chickens into 2 teams – grouped by similar colors. Each team should have 3 chickens. Divide the human players into those teams too.
- Make a 3x3 tic-tac-toe grid on the ground, the floor, or a table, by using something like:
- painter's tape
- plastic or paper plates or bowls
- a grid of large books
- Have the human players line up at a starting line away from the grid.
- When it's time to begin, each team will have one player run up to the grid & place a chicken from their team on the their desired spot on the grid. When the player returns to the starting line, it's time for the next player on their team to go.
- Once all 3 chickens have been placed, the player at the grid can move one chicken to another unoccupied spot.
- First team to get 3 chickens in a row wins!